THE LI WOOD CARVERS SHOW


Wednesday, September 11, 2019

An All-Girls Woodworking Group in West Texas

With artist supervision, a group of girls ages seven to 14 craft three-legged stools whose proceeds go towards their college funds

Lumber Club Marfa, an all-girls woodworking group in West Texas.Photo by Douglas Friedman.


Every Friday a group of girls, ages seven to 14, assembles in a woodshop in Marfa, Texas. Supervised by artist Larry Bamburg, they don masks and goggles, taking turns on the machinery to craft three-legged stools out of walnut, mahogany, and the like. Proceeds from the simple but

Learn to Carve Wooden Spoons

Have you ever tried carving a spoon? We have seen some of the most simple and some of the most ornate spoons over the years. Some are used for serving and eating, others (like the Welsh lovespoons) are used traditionally as symbols of love, and others are used for decoration. No matter the purpose of the spoon they are sure fun to carve.

Friday, June 28, 2019


Awful Woodworking Joke...
The members of the wood club were all getting on in years. At the annual Christmas dinner, there were now more widows than woodworkers. And the old guys left could hardly remember anything. Just before he stood up to make his address, the president had an idea. He and his wife had been in a furniture store earlier in the day and he had seen an unusual wood species, but he couldn’t quite recall what it was. He turned to the treasurer. 

Saturday, April 13, 2019

Meetings Planned 2019


May Reg Meeting - 5/14 Open Carving Night - 5/15
June Reg Meeting - 6/11 Open Carving Night - 6/19
September Reg Meeting - 9/10 Open Carving Night - 9/18
October Reg Meeting - 10/8 Open Carving Night - 10/16
November Reg Meeting - 11/12 Open Carving Night - 11/20
December Reg Meeing - 12/10 Open Carving Night - 12/18

Thursday, January 17, 2019

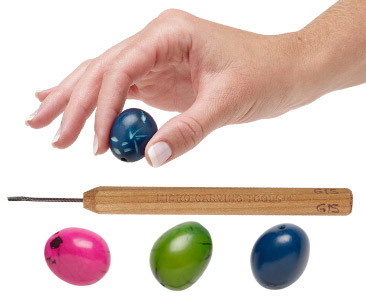
How to Carve Tagua Nuts

Instructions by Michelle Wood, Jewelry-Making Expert, Exclusively for Fire Mountain Gems and Beads®
D11R

: : : Materials : : :

STEP 1
Secure tagua nut bead in C-clamp. With non-dominant hand, hold clamp in place on flat work surface.
STEP 2
Using firm pressure, carve relief patterns in the dyed surface of the nut bead with microcarving tools.
Note: Use caution as micro-carving tools are extremely sharp. Always carve with tool moving away from your hands and body.
Have a question regarding this project? Email Customer Service.

Copyright Permissions

Permission to copy this instruction sheet is granted for non-commercial educational purposes only. All other reproduction requires written permission. Please email copyrightpermission@firemtn.com for more information.